#
Your first job
#
1. Submit new job
Submitting new jobs happens through the POST /job route. Note that you will need to pass the authentication header when making the call.
In the body of the HTTP POST request, you can specify how your job looks like. The most important parts are:
- Input files: which scan modalities you are sending over and how you will transfer them to the Engine API.
- Output files: which results you are expecting and how you will receive them from the Engine API.
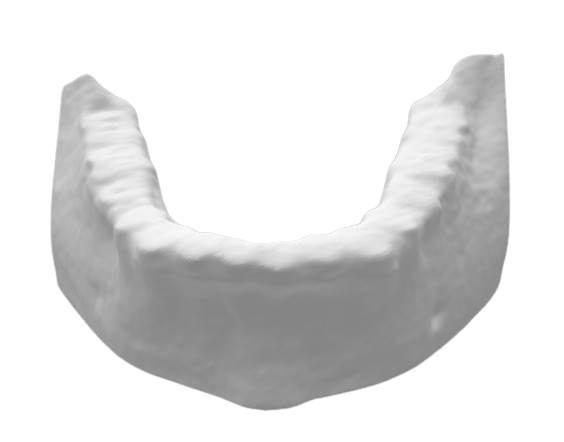
In this quick start guide, we start off with a very simple job, providing a CBCT scan as input file and requesting a mesh file of the segmented mandible as output.
There are many more options available, as explained later on in the dedicated section on constructing your job body.
The full API documentation can be found here. The options might look a bit overwhelming at first, but you can start off simple, by following this example.
On older versions of the Engine (v2 and older), the /job endpoint is called /generic-job.
Our simple job body will look like this. The input file is a single-file CBCT scan in DICOM format (.dcm). The output file is a single mesh file in STL format (.stl). We specify that the mesh should be generated for the structure "mandible".
{
    "inputFiles": {
        "cbct": {
            "extension": ".dcm"
        }
    },
    "outputFiles": {
        "meshes": [
            {
                "extension": ".stl",
                "structures": ["mandible"]
            }
        ]
    }
}
Now that we constructed our job body, we can submit it to the Engine API through the POST /job route. In the example below, we are using the 24.06 version of the engine in the EU region: https://eu.virtualpatientengine.com/24.06/job. We will do a HTTP POST request, passing the job body along (as JSON). We will also need to set the authentication header, as explained in the authentication section.
curl --request POST \
--url https://eu.virtualpatientengine.com/24.06/job \
--header "Authorization: Bearer <YOUR_GENERATED_ACCESS_TOKEN>" \
--header "Content-Type: application/json" \
--data @./request_body.json
var axios = require('axios');
const body = require('./request_body.json');
axios
.post('https://eu.virtualpatientengine.com/24.06/job', body, {
headers: {
Authorization: 'Bearer <YOUR_GENERATED_ACCESS_TOKEN>',
},
})
.then((response) => {
console.log(response.data);
});import http.client
import json
with open("./request_body.json", "r") as file:
data = json.load(file)
conn = http.client.HTTPSConnection("eu.virtualpatientengine.com")
headers = {"Authorization": "Bearer <YOUR_GENERATED_ACCESS_TOKEN>"}
conn.request("POST", "/24.06/job", json.dumps(data), headers=headers)
response = conn.getresponse()
print(response.read().decode())If everything is set up correctly, you will receive a 200 OK status response from the Engine API. The response body will contain useful information about the job in the form of a JSON object (needed for the next steps).
{
  "jobId": "<UNIQUE-UUID>",
  "presignedUploadUrl": {
    "cbct": {
      "presignedUploadUrl": "<UNIQUE-UPLOAD-URL>",
      "notifyFinishUploadUrl": "<UNIQUE-NOTIFICATION-URL>"
    },
  }
}
#
2. Upload your data
The job has been submitted successfully, but it will only start processing after all input data has been transferred.
- Upload the CBCT scan (DICOM file) to the provided pre-signed upload URL for the CBCT input file, using a
HTTP PUTrequest. - Notify the Engine API that the upload has finished, by sending a
HTTP PUTrequest to the provided notification URL.
The upload URL is pre-signed, so you do not need to add any authentication headers to the upload request. The notification URL requires the same authentication headers as used for the job submission.
curl --upload-file "/dicom.dcm" "<UNIQUE-UPLOAD-URL>"curl --request PUT \
--url "<UNIQUE-NOTIFICATION-URL>" \
--header "Authorization: Bearer <YOUR_GENERATED_ACCESS_TOKEN>"var axios = require('axios');
var fs = require('fs');
// 1. Upload the CBCT scan
const filePath = './dicom.dcm';
axios
.put('<UNIQUE-UPLOAD-URL>', fs.createReadStream(filePath), {
headers: {
'Content-length': fs.statSync(filePath).size,
},
})
.then((response) => {
console.log(response.status);
});// 2. Notify the Engine API
axios
.put('<UNIQUE-NOTIFICATION-URL>', null, {
headers: {
Authorization: 'Bearer <YOUR_GENERATED_ACCESS_TOKEN>',
},
})
.then((response) => {
console.log(response.status);
});import requests # We use requests since it's a bit easier to upload files
# 1. Upload the CBCT scan
with open("./dicom.dcm", "rb") as f:
result = requests.put(
"<UNIQUE-UPLOAD-URL>",
data=f,
headers={"Content-Type": "application/octet-stream"},
)
print(result.status_code)# 2. Notify the Engine API
result = requests.put(
"<UNIQUE-NOTIFICATION-URL>",
headers={"Authorization": "Bearer <YOUR_GENERATED_ACCESS_TOKEN>"},
)
print(result.status_code)This is a simplified example. For your production environment, we suggest to not use direct upload, but rather to provide pre-signed download URLs, pointing to the input data on your cloud storage (e.g., Amazon S3 or Azure Blob Storage). Using pre-signed download URLs reduces the resources that you spend on your servers.
#
3. Poll for the job status
Once all input data has been uploaded (and notified), the Engine API will start processing the job. You can periodically poll the job through the GET /pollJobResults route, passing the unique job ID (obtained from the response body when submitting the job) as a query parameter. For the Europe deployment, the full URL could look like this: https://eu.virtualpatientengine.com/24.06/pollJobResults?jobId=<UNIQUE-JOB-ID>.
curl --request GET \
  --url "https://eu.virtualpatientengine.com/24.06/pollJobResults?jobId=<UNIQUE-JOB-ID>" \
  --header "Authorization: Bearer <YOUR_GENERATED_ACCESS_TOKEN>"
var axios = require('axios');
axios
.get('https://eu.virtualpatientengine.com/24.06/pollJobResults?jobId=<UNIQUE-JOB-ID>', {
headers: {
Authorization: 'Bearer <YOUR_GENERATED_ACCESS_TOKEN>',
},
})
.then((response) => {
console.log(response.status);
console.log(response.data);
});import requests # We use requests since it's a bit easier to upload files
result = requests.get(
"https://eu.virtualpatientengine.com/24.06/pollJobResults?jobId=<UNIQUE-JOB-ID>",
headers={"Authorization": "Bearer <YOUR_GENERATED_ACCESS_TOKEN>"},
)
print(result.status_code)
print(result.json())As long as the job is processing, this route will return a 202 PROCESSING status code. This might take several minutes depending on the type of job and load on the servers.
As soon as the job processing has finished, the Engine API will return a 200 OK status code, together with a JSON response body. Although the body contains more information, we display a simplified version below. The most important part is the success flag, indicating that everything went well, and the outputFiles dictionary, containing the pre-signed download URLs for the output files (used in the next step).
{
  "success": true,
  "outputFiles": {
    "meshes": [
        {
            "status": "Available",
            "size": 12345,
            "extension": ".stl",
            "structures": ["mandible"],
            "url": "<UNIQUE-DOWNLOAD-URL>",
        }
    ],
  },
}
This is a simplified example. For your production environment, we suggest to not use polling, but rather use a webhook notification from the Engine API once the job has finished. Using the webhook approach reduces the resources that you spend on your servers.
#
4. Download the results
Now that the job has finished, you can download the results from the provided URL in the JSON response. Similar to the upload URLs, these are pre-signed, so you do not need to add any authentication headers to the request.
curl -o ./mandible.stl "<UNIQUE-DOWNLOAD-URL>"var axios = require('axios');
var fs = require('fs');
axios
.get('<UNIQUE-DOWNLOAD-URL>', {
responseType: 'stream',
})
.then((response) => {
response.data.pipe(fs.createWriteStream('./mandible.stl'));
});from urllib.request import urlretrieve
urlretrieve(
"<UNIQUE-DOWNLOAD-URL>",
"./mandible.stl",
)This is a simplified example. For your production environment, we suggest to not use direct download, but rather to provide pre-signed upload URLs, pointing to the location where we should upload the output data on your cloud storage (e.g., Amazon S3 or Azure Blob Storage). Using pre-signed upload URLs reduces the resources that you spend on your servers.
Congratulations on getting your first mandibular bone segmented! 🎉